Installing React Native on Windows Tutorial
Hi guys, in this article we are going to learn about the step by step setup guide for Installing React-Native on Windows, so lets
1. To Install React Native we need Node.js
Install Node.js and NPM. https://nodejs.org/en/
Verify whether NPM is installed by typing npm -v in a terminal window
2. Install React Native CLI
- Install by typing “npm install -g react-native-cli” in a terminal window
3. Install JDK( Java Development Kit )
Download and install JDK from Oracle’s official website oracle.com
http://www.oracle.com/technetwork/java/javase/downloads/index.html
4.Install Android Studio + SDK Manager
Download the Android Studio latest version from Google Android Developers official Page developer.android.com
Goto Files -> Settings
Or click simply SDK manager
Install latest android platform.
Add Environment Variable ANDROID_HOME in Windows :
React Native required ANDROID_HOME variable to compile and run apps. So define the ANDROID_HOME variable, to do so
- Click on Advanced System Settings.
- Click on Environment Variables.
- Click on New.
- Also, add Android_sdk/tools path in Environment variable path
6. Start an Android Virtual Device (AVD) :
First, download .NET Framework from this URL
Click on AVD Manager in Android studio
Click on Create New Virtual Device.
- Select your device and click on Next.
- Select Android OS version System Image. (You need to click on Download if you doing 1st time)
- Add a name for your AVD and hit the Finish button.
(Show Advanced Settings–>Make sure “Enabled keyboard input” is checked)
- After done creating, AVD just hit the Run button to start the AVD.
7. Create React-native project :
Open command Line and following command followed by Project name
- Create a new React Native project: react-native init TestProject
- This is how the project creates successfully

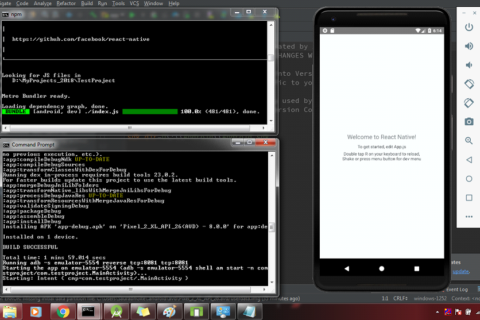
- Navigate to your project directory ( i.e. cd TestProject ) and type: npm start
- In another terminal window, navigate to the project directory and type: react-native run-android
If you get the following error in terminal.
- Create a “local.properties” file in the root of your projects directory and add the following path in it:
sdk.dir=D:\Android\Android_sdk (Make sure this file Type is PROPERTIES file)
And again hit react-native run-android
This is how we can achieve Installing React-Native on Windows.
Thank you 🙂 Enjoy coding…


